
Smart Views are limited representations of Grade Center data based on selected criteria. The Blackboard system creates a number of useful default smart views. Instructors can actually create their own criteria by adding a set of criteria that reflect specific student activity and success in the course. This article will show you how to create a smart view, set smart view criteria, and add a smart view to the dashboard for quick access.
Accessing the Grade Center
Log into your Blackboard course and go to the Control Panel:
Click on Grade Center.
Select Full Grade Center.

Accessing Smart Views
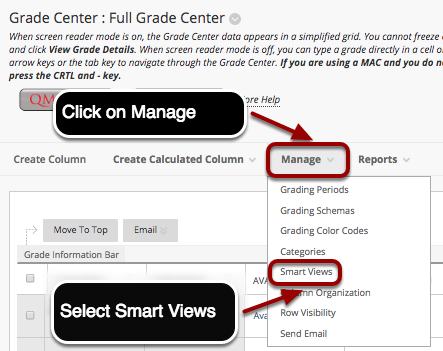
Creating a Smart View
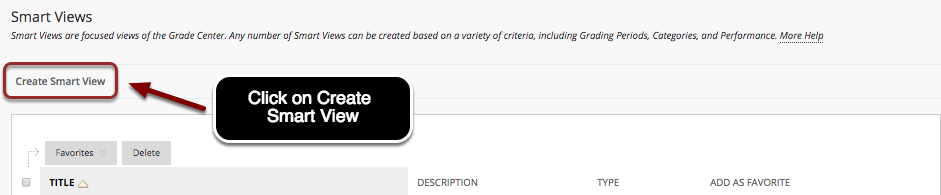
You will be taken to a screen labeled Smart Views that lists Grade Center smart views. To create a Smart View, press the Create Smart View button at the top of the screen.
Creating SmartViews for a Single Section
It is possible to create smart views for courses that are not merged with another course. To create a smart view for a single section, follow the instructions below:
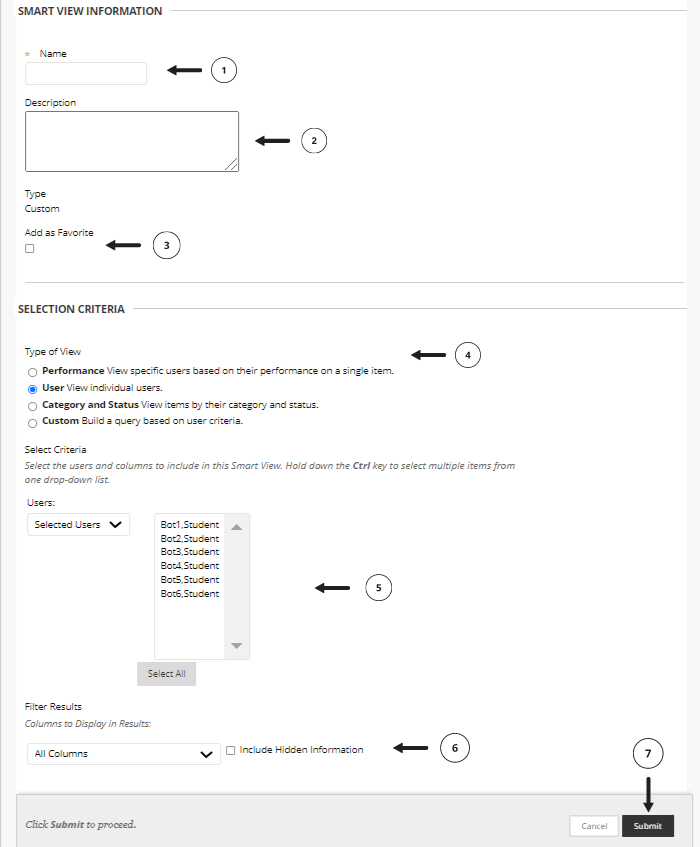
Give a name -> Enter what you would like to name the SmartView here.
Description -> Enter a description here (optional).
Add as Favorite -> Check this box to add the Smart View as a favorite, where it would be listed in the Control Panel, below Full Grade Center. (Yes)
Type of View -> Select User.
Select Criteria -> To view all of the users, select All Users from the drop-down list. To view the users separately, select Selected Users from the drop-down list. To select multiple users from the list, hold down the Ctrl key.
Filter Results -> Select All Columns.
Submit.
Creating SmartViews for Merged Sections
To create a smart view for a child course section, follow the instructions below:
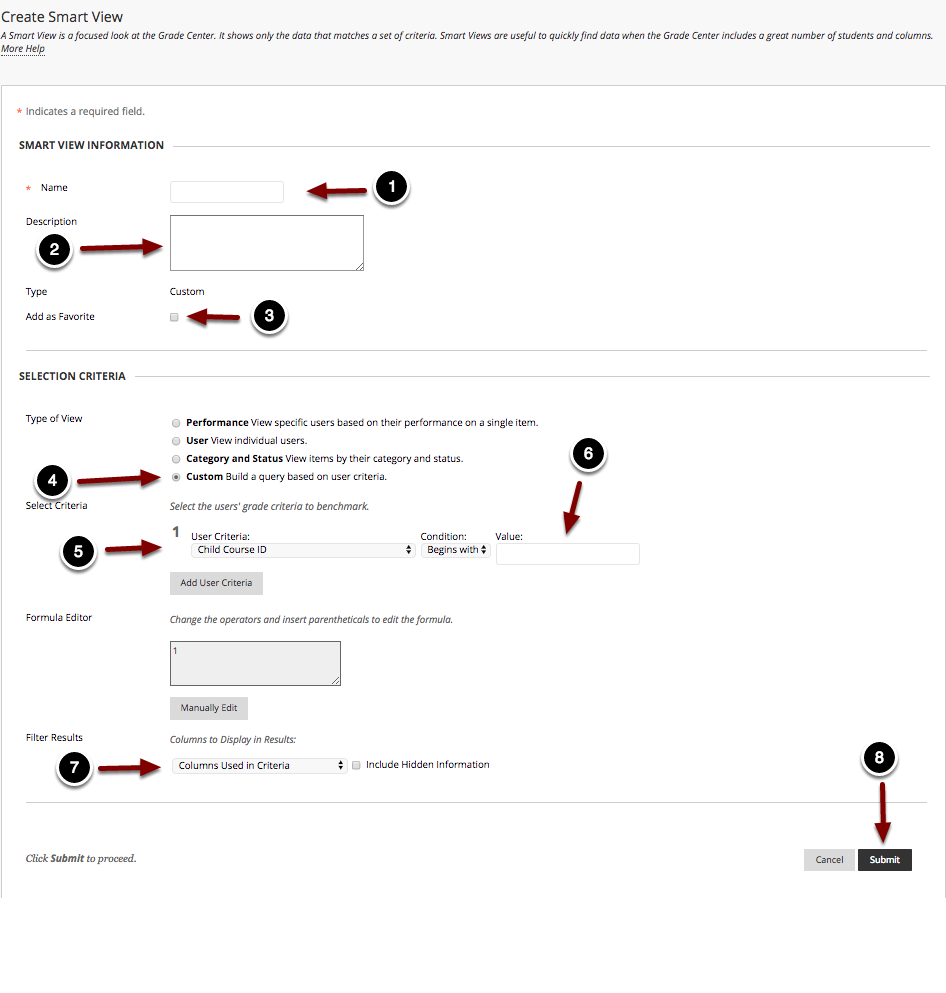
Give a name ( Section 1 or 2) -> Enter the section name here.
Description: Enter a description here (optional).
Add as Favorite -> Check this box to add the Smart View as a favorite, where it would be listed in the Control Panel, below Full Grade Center. (Yes)
Type of View -> Select Custom.
Select Criteria-> Select the column labeled Child Course ID from the dropdown menu. (select "Section" Column you created in step 1.)
Select Criteria: Value -> Enter the child course ID of the section here. Ignore the item labeled Formula Editor.
Filter results -> all columns (this is what you really want)
Submit.
 When finished, click the Submit button to create the Smart View. You would need to repeat this process for each section. You should see it under grade center menu.